Installation and setup
I will show you 2 methods to install TW Elements:
- CDN method - the easiest and fastest method, but with many limitations. In fact, it should only be used for quick testing.
- MDB CLI installation - a recommended method that allows you to use the full potential of the TW Elements environment
I suggest you try both methods, but in the end it's best if you use MDB CLI.
In this lesson, we will use the CDN method. This means that instead of the normal installation, we will simply attach the appropriate links to our project and thanks to this we will be able to use Tailwind and TW Elements.
Note: The code editor is a matter of preference, but if someone asks me what I would recommend, my answer is Visual Studio Code.
It's free and you can download it here.
Step 1 - create an empty folder
Create an empty folder in a convenient location for you and name it whatever you want.
I created mine on the desktop and named it
"te-quick-start" ("twe" being short for TW Elements)
Next, open this folder in your code editor.
Step 2 - create index.html file
Create a new file and name it index.html
In Visual Studio Code, you can click ctrl + n to
create a new file, then ctrl + s to save the file.
Save the file as index.html in the folder created in the
previous step.
Step 3 - add basic HTML
Add basic structure and HTML tags to your index.html file
    <!DOCTYPE html>
    <html lang="en">
      <head>
        <meta charset="UTF-8" />
        <meta http-equiv="X-UA-Compatible" content="IE=edge" />
        <meta name="viewport" content="width=device-width, initial-scale=1.0" />
        <title>TW Elements Quick Start</title>
      </head>

      <body></body>
    </html>
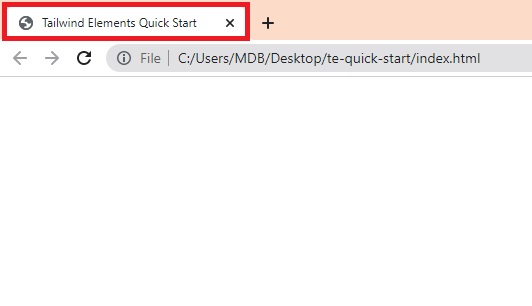
After saving the file, open it in the browser by dragging and dropping it into the browser window.
You should see a blank screen, but the tab title will say "TW Elements Quick Start"
Step 4 - add TW Elements
Now we will add few links to our index.html file, namely:
- Roboto font
- TW Elements styles
- Tailwind CSS config
- TW Elements JavaScript
Update the index.html file so that it looks like this:
    <!DOCTYPE html>
    <html lang="en">
      <head>
        <meta charset="UTF-8" />
        <meta http-equiv="X-UA-Compatible" content="IE=edge" />
        <meta name="viewport" content="width=device-width, initial-scale=1.0" />
        <title>TW Elements Quick Start</title>

        <!-- Roboto font -->
        <link
          href="https://fonts.googleapis.com/css?family=Roboto:300,400,500,700,900&display=swap"
          rel="stylesheet" />

        <!-- TW Elements styles-->
        <link
          rel="stylesheet"
          href="https://cdn.jsdelivr.net/npm/tw-elements/dist/css/tw-elements.min.css" />

        <!-- Tailwind CSS config -->
        <script src="https://cdn.tailwindcss.com/3.3.0"></script>
        <script>
          tailwind.config = {
            darkMode: "class",
            theme: {
              fontFamily: {
                sans: ["Roboto", "sans-serif"],
                body: ["Roboto", "sans-serif"],
                mono: ["ui-monospace", "monospace"],
              },
            },
            corePlugins: {
              preflight: false,
            },
          };
        </script>
      </head>

      <body>
        <!-- TW Elements JavaScript -->
        <script src="https://cdn.jsdelivr.net/npm/tw-elements/dist/js/tw-elements.umd.min.js"></script>
      </body>
    </html>
Step 5 - test if it works
Everything is now ready and should work as it should. So let's take one of the TW Elements dynamic components, for example Carousel and insert it into our project.
Go to the
Carousel docs, click show code button and copy the HTML
code of the basic example:
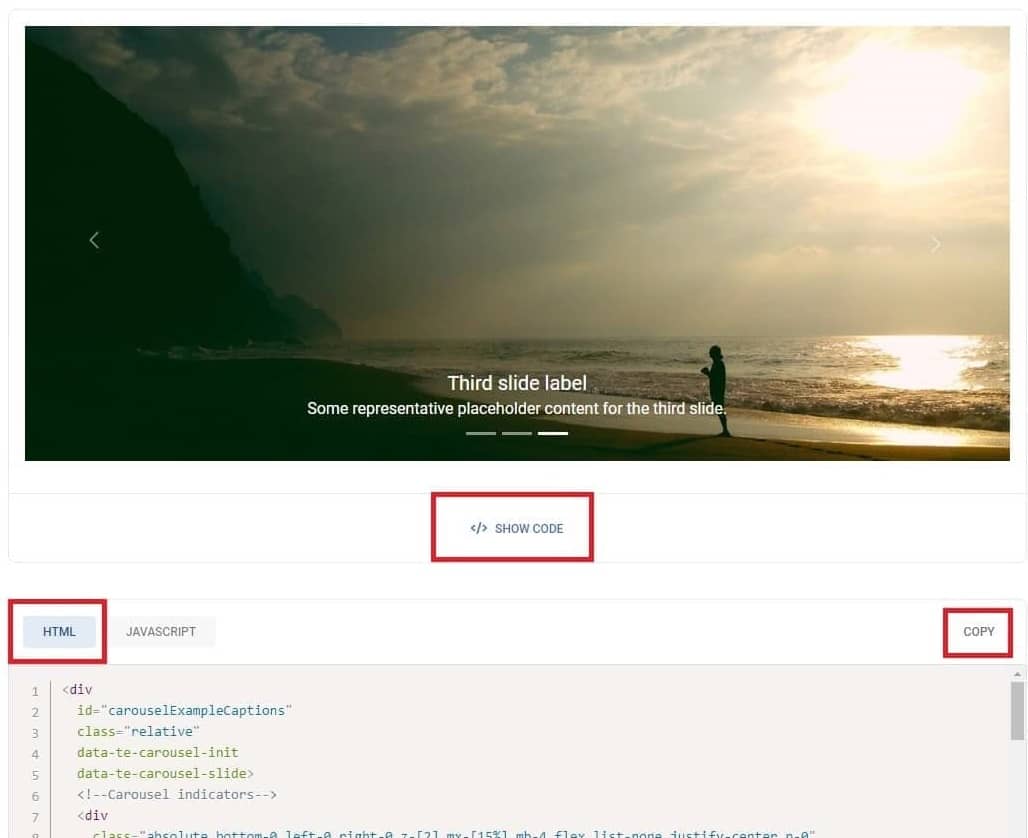
Note that there is also a JavaScript tab, and the code there is used to initialize the components. However, when using Tailwind Elements in CDN form, we don't need to initialize them and all components work out of the box, just with pure HTML.
So let's paste the copied Carousel HTML code below the opening
<body> tag:
    <div
      id="carouselExampleCaptions"
      class="relative"
      data-twe-carousel-init
      data-twe-carousel-slide>
      <!--Carousel indicators-->
      <div
        class="absolute bottom-0 left-0 right-0 z-[2] mx-[15%] mb-4 flex list-none justify-center p-0"
        data-twe-carousel-indicators>
        <button
          type="button"
          data-twe-target="#carouselExampleCaptions"
          data-twe-slide-to="0"
          data-twe-carousel-active
          class="mx-[3px] box-content h-[3px] w-[30px] flex-initial cursor-pointer border-0 border-y-[10px] border-solid border-transparent bg-white bg-clip-padding p-0 -indent-[999px] opacity-50 transition-opacity duration-[600ms] ease-[cubic-bezier(0.25,0.1,0.25,1.0)] motion-reduce:transition-none"
          aria-current="true"
          aria-label="Slide 1"></button>
        <button
          type="button"
          data-twe-target="#carouselExampleCaptions"
          data-twe-slide-to="1"
          class="mx-[3px] box-content h-[3px] w-[30px] flex-initial cursor-pointer border-0 border-y-[10px] border-solid border-transparent bg-white bg-clip-padding p-0 -indent-[999px] opacity-50 transition-opacity duration-[600ms] ease-[cubic-bezier(0.25,0.1,0.25,1.0)] motion-reduce:transition-none"
          aria-label="Slide 2"></button>
        <button
          type="button"
          data-twe-target="#carouselExampleCaptions"
          data-twe-slide-to="2"
          class="mx-[3px] box-content h-[3px] w-[30px] flex-initial cursor-pointer border-0 border-y-[10px] border-solid border-transparent bg-white bg-clip-padding p-0 -indent-[999px] opacity-50 transition-opacity duration-[600ms] ease-[cubic-bezier(0.25,0.1,0.25,1.0)] motion-reduce:transition-none"
          aria-label="Slide 3"></button>
      </div>

      <!--Carousel items-->
      <div
        class="relative w-full overflow-hidden after:clear-both after:block after:content-['']">
        <!--First item-->
        <div
          class="relative float-left -me-[100%] w-full transition-transform duration-[600ms] ease-in-out motion-reduce:transition-none"
          data-twe-carousel-active
          data-twe-carousel-item
          style="backface-visibility: hidden">
          <img
            src="https://tecdn.b-cdn.net/img/Photos/Slides/img%20(15).jpg"
            class="block w-full"
            alt="..." />
          <div
            class="absolute inset-x-[15%] bottom-5 hidden py-5 text-center text-white md:block">
            <h5 class="text-xl">First slide label</h5>
            <p>Some representative placeholder content for the first slide.</p>
          </div>
        </div>
        <!--Second item-->
        <div
          class="relative float-left -me-[100%] hidden w-full transition-transform duration-[600ms] ease-in-out motion-reduce:transition-none"
          data-twe-carousel-item
          style="backface-visibility: hidden">
          <img
            src="https://tecdn.b-cdn.net/img/Photos/Slides/img%20(22).jpg"
            class="block w-full"
            alt="..." />
          <div
            class="absolute inset-x-[15%] bottom-5 hidden py-5 text-center text-white md:block">
            <h5 class="text-xl">Second slide label</h5>
            <p>Some representative placeholder content for the second slide.</p>
          </div>
        </div>
        <!--Third item-->
        <div
          class="relative float-left -me-[100%] hidden w-full transition-transform duration-[600ms] ease-in-out motion-reduce:transition-none"
          data-twe-carousel-item
          style="backface-visibility: hidden">
          <img
            src="https://tecdn.b-cdn.net/img/Photos/Slides/img%20(23).jpg"
            class="block w-full"
            alt="..." />
          <div
            class="absolute inset-x-[15%] bottom-5 hidden py-5 text-center text-white md:block">
            <h5 class="text-xl">Third slide label</h5>
            <p>Some representative placeholder content for the third slide.</p>
          </div>
        </div>
      </div>

      <!--Carousel controls - prev item-->
      <button
        class="absolute bottom-0 left-0 top-0 z-[1] flex w-[15%] items-center justify-center border-0 bg-none p-0 text-center text-white opacity-50 transition-opacity duration-150 ease-[cubic-bezier(0.25,0.1,0.25,1.0)] hover:text-white hover:no-underline hover:opacity-90 hover:outline-none focus:text-white focus:no-underline focus:opacity-90 focus:outline-none motion-reduce:transition-none"
        type="button"
        data-twe-target="#carouselExampleCaptions"
        data-twe-slide="prev">
        <span class="inline-block h-8 w-8">
          <svg
            xmlns="http://www.w3.org/2000/svg"
            fill="none"
            viewBox="0 0 24 24"
            stroke-width="1.5"
            stroke="currentColor"
            class="h-6 w-6">
            <path
              stroke-linecap="round"
              stroke-linejoin="round"
              d="M15.75 19.5L8.25 12l7.5-7.5" />
          </svg>
        </span>
        <span
          class="!absolute !-m-px !h-px !w-px !overflow-hidden !whitespace-nowrap !border-0 !p-0 ![clip:rect(0,0,0,0)]"
          >Previous</span
        >
      </button>
      <!--Carousel controls - next item-->
      <button
        class="absolute bottom-0 right-0 top-0 z-[1] flex w-[15%] items-center justify-center border-0 bg-none p-0 text-center text-white opacity-50 transition-opacity duration-150 ease-[cubic-bezier(0.25,0.1,0.25,1.0)] hover:text-white hover:no-underline hover:opacity-90 hover:outline-none focus:text-white focus:no-underline focus:opacity-90 focus:outline-none motion-reduce:transition-none"
        type="button"
        data-twe-target="#carouselExampleCaptions"
        data-twe-slide="next">
        <span class="inline-block h-8 w-8">
          <svg
            xmlns="http://www.w3.org/2000/svg"
            fill="none"
            viewBox="0 0 24 24"
            stroke-width="1.5"
            stroke="currentColor"
            class="h-6 w-6">
            <path
              stroke-linecap="round"
              stroke-linejoin="round"
              d="M8.25 4.5l7.5 7.5-7.5 7.5" />
          </svg>
        </span>
        <span
          class="!absolute !-m-px !h-px !w-px !overflow-hidden !whitespace-nowrap !border-0 !p-0 ![clip:rect(0,0,0,0)]"
          >Next</span
        >
      </button>
    </div>
After saving the file and refreshing your browser window, you should see a working carousel. After clicking on the arrows, the slides should change, which means that both the TW Elements styles and the necessary JavaScript work correctly.
.jpg)
.jpg)
.jpg)
If something doesn't work, make sure you followed all the steps correctly.
Finally, your index.html file should look like this:
    <!DOCTYPE html>
    <html lang="en">
      <head>
        <meta charset="UTF-8" />
        <meta http-equiv="X-UA-Compatible" content="IE=edge" />
        <meta name="viewport" content="width=device-width, initial-scale=1.0" />
        <title>TW Elements Quick Start</title>

        <!-- Roboto font -->
        <link
          href="https://fonts.googleapis.com/css?family=Roboto:300,400,500,700,900&display=swap"
          rel="stylesheet" />

        <!-- TW Elements styles -->
        <link
          rel="stylesheet"
          href="https://cdn.jsdelivr.net/npm/tw-elements/dist/css/tw-elements.min.css" />

        <!-- Tailwind CSS config -->
        <script src="https://cdn.tailwindcss.com/3.3.0"></script>
        <script>
          tailwind.config = {
            darkMode: "class",
            theme: {
              fontFamily: {
                sans: ["Roboto", "sans-serif"],
                body: ["Roboto", "sans-serif"],
                mono: ["ui-monospace", "monospace"],
              },
            },
            corePlugins: {
              preflight: false,
            },
          };
        </script>
      </head>

      <body>
        <div
          id="carouselExampleCaptions"
          class="relative"
          data-twe-carousel-init
          data-twe-carousel-slide>
          <!--Carousel indicators-->
          <div
            class="absolute bottom-0 left-0 right-0 z-[2] mx-[15%] mb-4 flex list-none justify-center p-0"
            data-twe-carousel-indicators>
            <button
              type="button"
              data-twe-target="#carouselExampleCaptions"
              data-twe-slide-to="0"
              data-twe-carousel-active
              class="mx-[3px] box-content h-[3px] w-[30px] flex-initial cursor-pointer border-0 border-y-[10px] border-solid border-transparent bg-white bg-clip-padding p-0 -indent-[999px] opacity-50 transition-opacity duration-[600ms] ease-[cubic-bezier(0.25,0.1,0.25,1.0)] motion-reduce:transition-none"
              aria-current="true"
              aria-label="Slide 1"></button>
            <button
              type="button"
              data-twe-target="#carouselExampleCaptions"
              data-twe-slide-to="1"
              class="mx-[3px] box-content h-[3px] w-[30px] flex-initial cursor-pointer border-0 border-y-[10px] border-solid border-transparent bg-white bg-clip-padding p-0 -indent-[999px] opacity-50 transition-opacity duration-[600ms] ease-[cubic-bezier(0.25,0.1,0.25,1.0)] motion-reduce:transition-none"
              aria-label="Slide 2"></button>
            <button
              type="button"
              data-twe-target="#carouselExampleCaptions"
              data-twe-slide-to="2"
              class="mx-[3px] box-content h-[3px] w-[30px] flex-initial cursor-pointer border-0 border-y-[10px] border-solid border-transparent bg-white bg-clip-padding p-0 -indent-[999px] opacity-50 transition-opacity duration-[600ms] ease-[cubic-bezier(0.25,0.1,0.25,1.0)] motion-reduce:transition-none"
              aria-label="Slide 3"></button>
          </div>

          <!--Carousel items-->
          <div
            class="relative w-full overflow-hidden after:clear-both after:block after:content-['']">
            <!--First item-->
            <div
              class="relative float-left -me-[100%] w-full transition-transform duration-[600ms] ease-in-out motion-reduce:transition-none"
              data-twe-carousel-active
              data-twe-carousel-item
              style="backface-visibility: hidden">
              <img
                src="https://tecdn.b-cdn.net/img/Photos/Slides/img%20(15).jpg"
                class="block w-full"
                alt="..." />
              <div
                class="absolute inset-x-[15%] bottom-5 hidden py-5 text-center text-white md:block">
                <h5 class="text-xl">First slide label</h5>
                <p>
                  Some representative placeholder content for the first slide.
                </p>
              </div>
            </div>
            <!--Second item-->
            <div
              class="relative float-left -me-[100%] hidden w-full transition-transform duration-[600ms] ease-in-out motion-reduce:transition-none"
              data-twe-carousel-item
              style="backface-visibility: hidden">
              <img
                src="https://tecdn.b-cdn.net/img/Photos/Slides/img%20(22).jpg"
                class="block w-full"
                alt="..." />
              <div
                class="absolute inset-x-[15%] bottom-5 hidden py-5 text-center text-white md:block">
                <h5 class="text-xl">Second slide label</h5>
                <p>
                  Some representative placeholder content for the second slide.
                </p>
              </div>
            </div>
            <!--Third item-->
            <div
              class="relative float-left -me-[100%] hidden w-full transition-transform duration-[600ms] ease-in-out motion-reduce:transition-none"
              data-twe-carousel-item
              style="backface-visibility: hidden">
              <img
                src="https://tecdn.b-cdn.net/img/Photos/Slides/img%20(23).jpg"
                class="block w-full"
                alt="..." />
              <div
                class="absolute inset-x-[15%] bottom-5 hidden py-5 text-center text-white md:block">
                <h5 class="text-xl">Third slide label</h5>
                <p>
                  Some representative placeholder content for the third slide.
                </p>
              </div>
            </div>
          </div>

          <!--Carousel controls - prev item-->
          <button
            class="absolute bottom-0 left-0 top-0 z-[1] flex w-[15%] items-center justify-center border-0 bg-none p-0 text-center text-white opacity-50 transition-opacity duration-150 ease-[cubic-bezier(0.25,0.1,0.25,1.0)] hover:text-white hover:no-underline hover:opacity-90 hover:outline-none focus:text-white focus:no-underline focus:opacity-90 focus:outline-none motion-reduce:transition-none"
            type="button"
            data-twe-target="#carouselExampleCaptions"
            data-twe-slide="prev">
            <span class="inline-block h-8 w-8">
              <svg
                xmlns="http://www.w3.org/2000/svg"
                fill="none"
                viewBox="0 0 24 24"
                stroke-width="1.5"
                stroke="currentColor"
                class="h-6 w-6">
                <path
                  stroke-linecap="round"
                  stroke-linejoin="round"
                  d="M15.75 19.5L8.25 12l7.5-7.5" />
              </svg>
            </span>
            <span
              class="!absolute !-m-px !h-px !w-px !overflow-hidden !whitespace-nowrap !border-0 !p-0 ![clip:rect(0,0,0,0)]"
              >Previous</span
            >
          </button>
          <!--Carousel controls - next item-->
          <button
            class="absolute bottom-0 right-0 top-0 z-[1] flex w-[15%] items-center justify-center border-0 bg-none p-0 text-center text-white opacity-50 transition-opacity duration-150 ease-[cubic-bezier(0.25,0.1,0.25,1.0)] hover:text-white hover:no-underline hover:opacity-90 hover:outline-none focus:text-white focus:no-underline focus:opacity-90 focus:outline-none motion-reduce:transition-none"
            type="button"
            data-twe-target="#carouselExampleCaptions"
            data-twe-slide="next">
            <span class="inline-block h-8 w-8">
              <svg
                xmlns="http://www.w3.org/2000/svg"
                fill="none"
                viewBox="0 0 24 24"
                stroke-width="1.5"
                stroke="currentColor"
                class="h-6 w-6">
                <path
                  stroke-linecap="round"
                  stroke-linejoin="round"
                  d="M8.25 4.5l7.5 7.5-7.5 7.5" />
              </svg>
            </span>
            <span
              class="!absolute !-m-px !h-px !w-px !overflow-hidden !whitespace-nowrap !border-0 !p-0 ![clip:rect(0,0,0,0)]"
              >Next</span
            >
          </button>
        </div>

        <!-- TW Elements JavaScript -->
        <script src="https://cdn.jsdelivr.net/npm/tw-elements/dist/js/tw-elements.umd.min.js"></script>
      </body>
    </html>
Step 6 - play with TW Elements
If everything works as it should, all you have to do is browse through the available components and functionalities and experiment with Tailwind Elements.
Simply copy it from our documentation and paste to your
index.html file.
In the menu on the left you will find dozens of different components and hundreds of options.

Have fun!
If something doesn't work as it should, you can always hit me on twitter 😉
Note: The CDN method is for testing and experimentation. You shouldn't use it for serious projects. Once you're done with the playing around, move on to the next lessons and install TW Elements using MDB CLI method.

About author
Michal Szymanski
Co Founder at TW Elements and MDBootstrap / Listed in Forbes „30 under 30" / Open-source enthusiast / Dancer, nerd & book lover.
Author of hundreds of articles on programming, business, marketing and productivity. In the past, an educator working with troubled youth in orphanages and correctional facilities.